How to Change Font Size in Gmail
Do you want to increase font size in Gmail? Well, then you are at the right place. With the help of this guide, you will learn how to view the fonts bigger and better in Gmail application. To clarify, this will increase the font for your device. Because of that, you will be able to view larger fonts in Gmail as well. So, without further ado, let's get going!
Increase font size in Gmail App in 10 Easy Steps
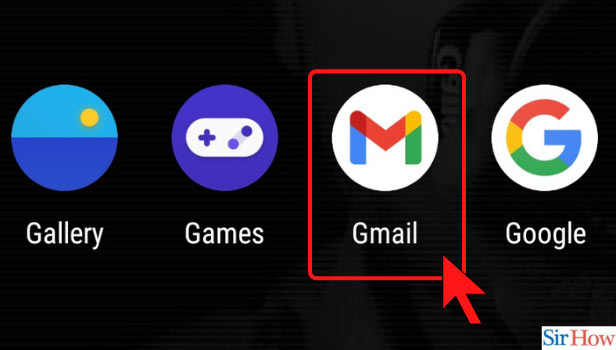
Step-1 Open Gmail App: On your mobile device, firstly, go to Gmail application. From there, you need to make some setting before you can increase the font size overall.
Step-2 Click on Three Dash Icon: In the top-left corner, there is an icon with three horizonal bars. Click on that to go to see window of different options that will help you go further.

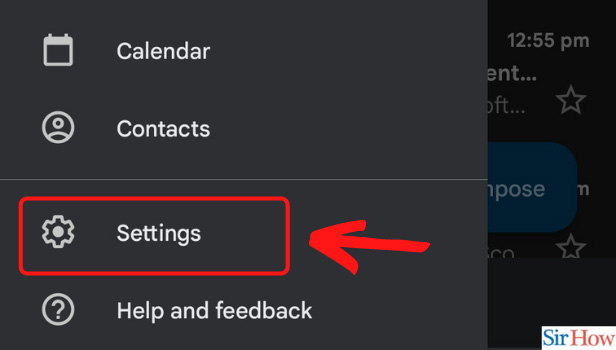
Step-3 Go to Gmail Settings: In the list of options that pop up from the left side, scroll down to find the settings option. It will be the second last option before help and feedback.
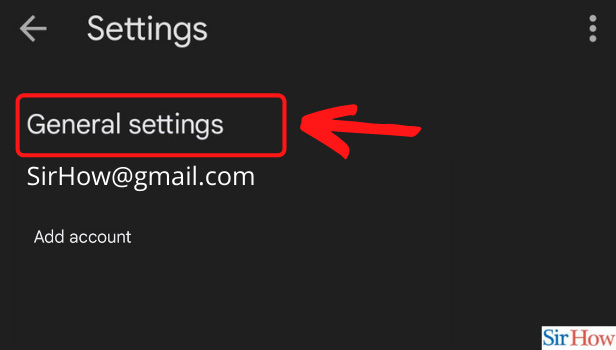
Step-4 Click on General Settings: Under the settings option, click on general settings.
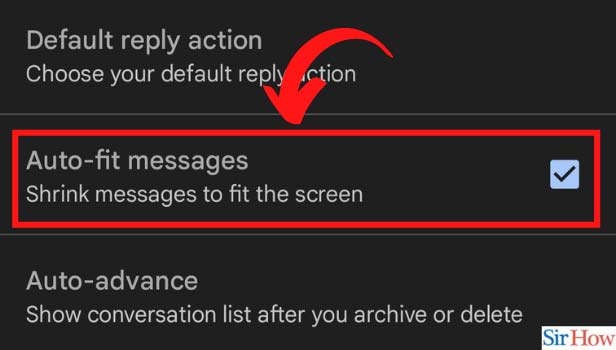
Step-5 Uncheck the Box: Here, there are many different settings related to your Gmail. To increase font size in Gmail, you need to uncheck the option of 'Auto-fit messages'.
This option shrinks the messages so that it fits the screen. So, when you open any mail, you see it exactly fit according to your screen. Set to a specific size.
When this option is checked, the steps to change default font size in Gmail will just increase or decrease the size you see in inbox. It doesn't affect the mail and as a result, your mail will be in smaller text only.
Step-6 Phone Settings: After unchecking the box of 'Auto-fit' from Gmail, open your device's settings. The settings app that you use for various changes for your device.
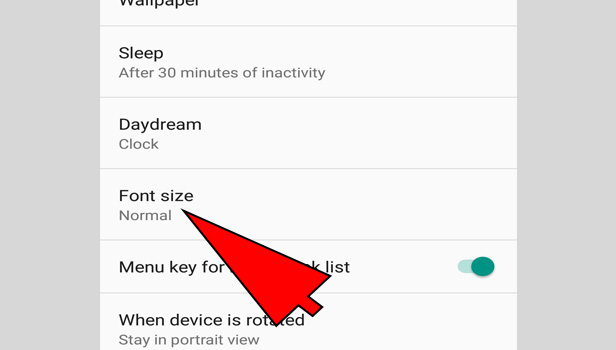
Step-7 Click on Display Settings: Now, to increase font size in Gmail, go to display option under settings.
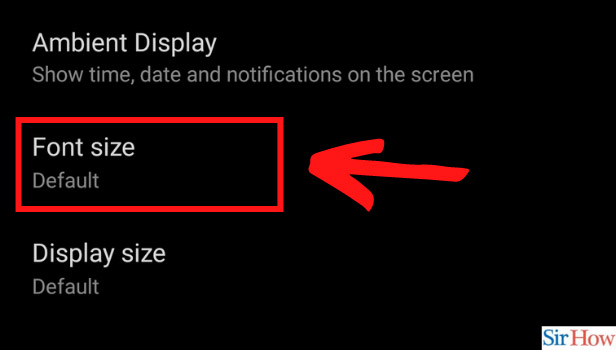
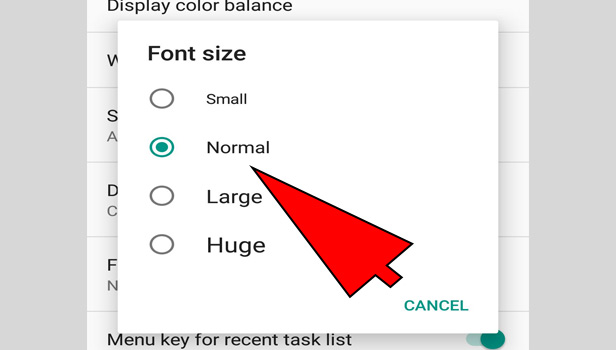
Step-8 Font Size Option: Under the display, you will have a setting related to font size. It will either be Font Size and Style or just Font. See which one is for your device and click on it.
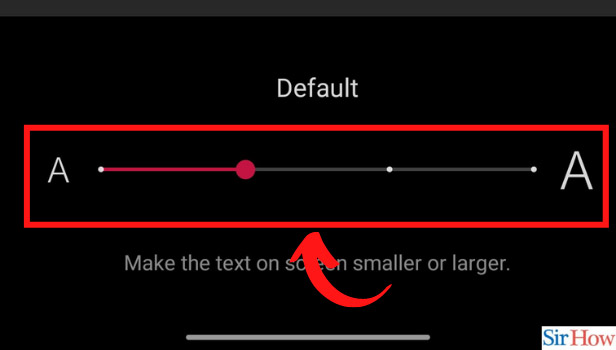
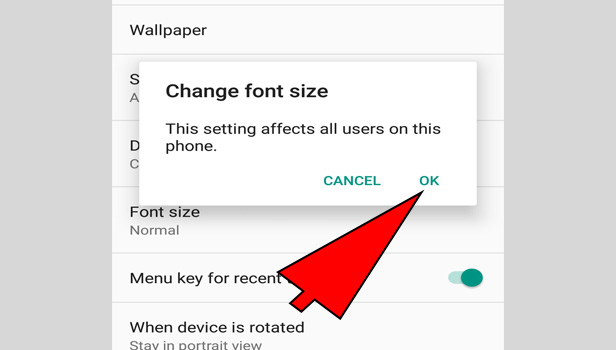
Step-9 Increase from Default: You will see a slider bar as in the image below or have options of sizes. Small, medium, large, extra-large, can be the options available to you. Now choose the bigger one from the default size.
Step-10 Check-in Gmail: After you increase the size, do not forget to go back to the Gmail application. Check if the font size has increased or not.
Secondly, open any specific mail to see if you can see that too in larger font or not. If you have successfully followed Step-5, you will see larger text inside the mail also. Otherwise, it will be visible in a regular manner inside.

Thus, like this, you can increase font size in Gmail. You might have a question if you are increasing font size from device settings itself, then it should be applicable to all other apps too?
Well, you are right. The font size is increased for other applications as well with this. The only change for Gmail is, you need to uncheck the auto-fit messages to see larger fonts for actual messages and not just for a list of emails.
Emails are used for the purpose of communication, with family, friends and for business purpose. The font size should be simple or in a readable form so that other people can clearly read it. The change in the font size can be done by various methods and we are going to discuss them after the other.
How to change Font Size in Gmail on browser
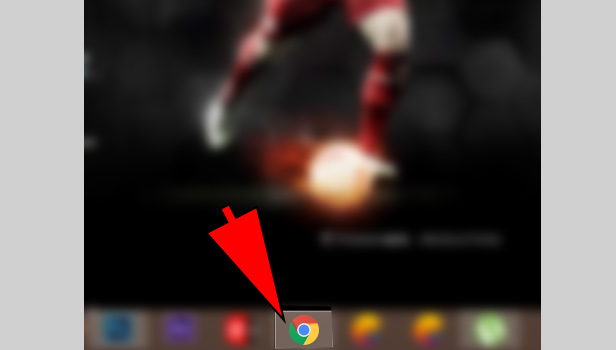
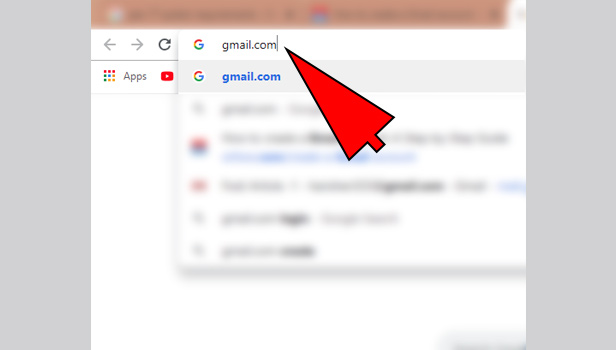
1. Open Browser: Open your browser such as google chrome and click on it and type Gmail.com on the search bar.

2. Enter Email id & Password: Now, you can enter your email-id with password and click on login button.

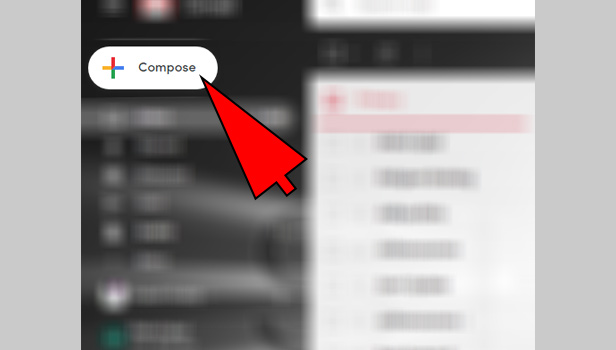
3. Click on Compose: click on compose icon and compose your e-mail message.
4. Click on Formatting-option: On the bottom, you can see there is a formation option in which font-style, font-size, font-type all this options are available.
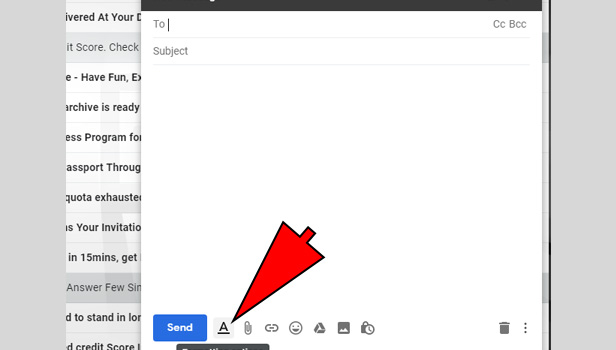
5. Click on Font-Style Button: there is a button just above the send button through which you can change the font-family.
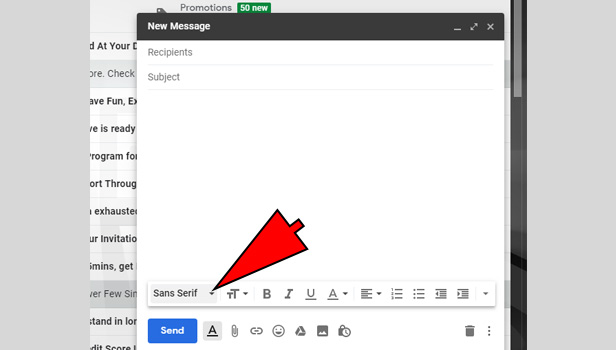
6. Change Font-Size: Just after the font-family, there is double T selector which can change the size of the font from large to small.
How to change the font size in Gmail for chrome
1. Open Google Chrome: First, open google in your browser and type www.gmail.com on the search box.
2. Enter Email id & password: After this, you can see the Gmail account login, and you can enter your email-id and password.
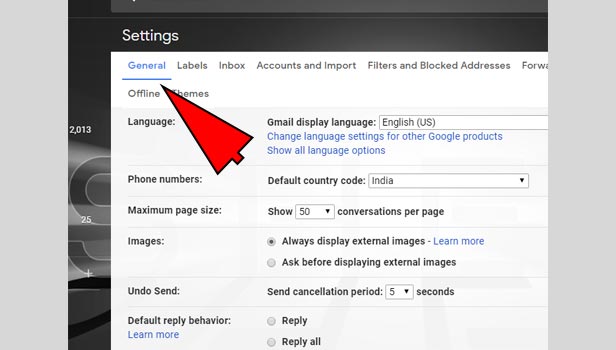
3. Go To Settings: On the top of the right corner, you can see the settings button, which is circled-shaped, click on that.

4. Click on Setting the Font-size: after clicking on the settings you can see there is number of options in general, labels etc. Choose general option.
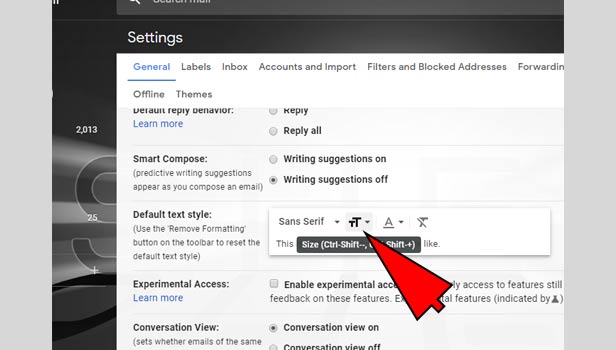
5. Choose Default Text style: you can see there is default text style option.
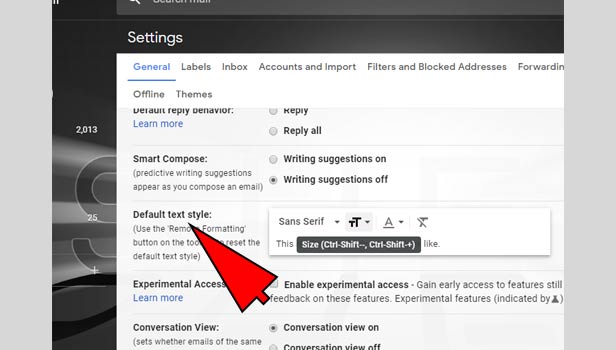
6. Change the font-size: just after the font-family selector, there is a double TT option click on that, and you can change the Font-size from small to large and huge to medium.
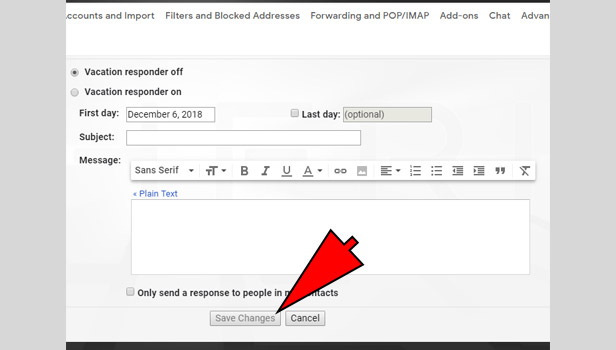
7. Save Changes: On the bottom of this page , there is save changes button click on that.
8. Click on Compose: click on compose button, write an email and you can automatically see the change in font size.
How to change font size in Gmail for android app
The settings procedure of every phone is different. The steps we are discussing below may be varies from phone to phone.
Change Font-size in Gmail for android app
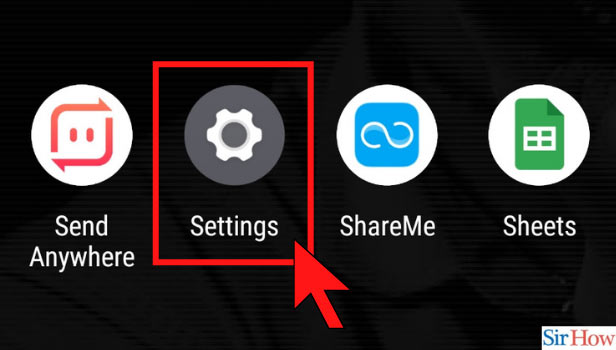
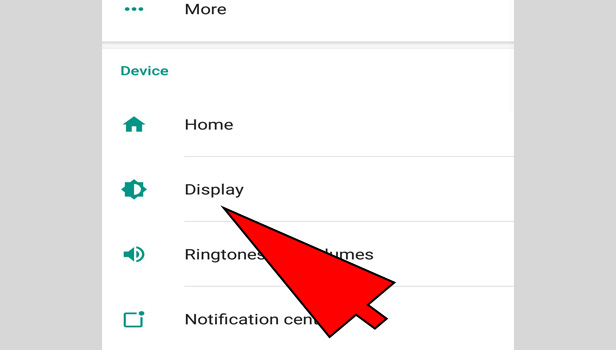
1. Open Settings: First, open the settings option in your android phone.

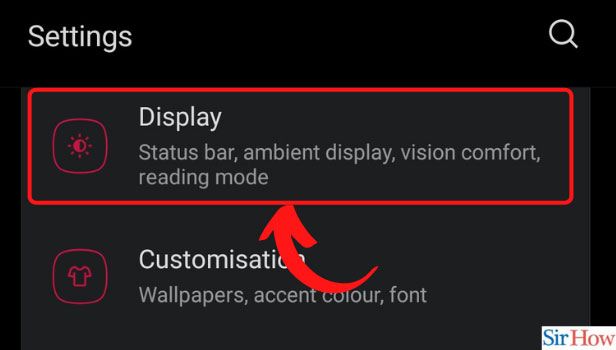
2. Tap on Display: scroll down, you can see the display option and then click on that.
3. Click on Font: after clicking the display option, you can see there is a font option, click on that option.
4. Change in Font size: after clicking, there is an option of font size which varies from tiny to huge, you can change the font size with your hand by holding your finger on the blue dotted circle.
5. Save Changes: After you change the font size from tiny to huge, you can click on done option to save it.
6. Go to the Gmail app: Go to your Gmail app, and you can see the changes in the font size, if you want to write an email, you can see the font size is changed now.
7. Back to the settings: In case, if you want to decrease or increase the font size again you can repeat the above procedure.
This is the most convenient method for changing the font size in Gmail for android phones. There is no need to install any other tools, you just go to settings and change the font size according to your requirement.
By using this method you can easily change the font size in your Gmail account and write an attractive email to your loved ones and also for business or meeting purposes.